About Data
The Data section holds your master data: the products, branches, suppliers, customers, users and lookup lists that every transaction uses. Set these up before you start entering transactions.
Menu: Data
Suggested setup order
- Branch and Bin Location: where stock is kept.
- UOM, Category, Brand and Product Tag: used to describe products.
- Supplier, then Product (decide each product's management type and grouping type first).
- Customer Group, Customer, Member Rate and Member.
- Bank, Bank Account, Payment Method and Payment Surcharge: used in payments and collections.
- Reason, Other Expense Type, Other Income Type and Disc/Adj Type.
- Role, User and Employee.
Two kinds of data screens
Lists you edit in place
Simple lists such as Brand, UOM and Reason are edited directly in the table:
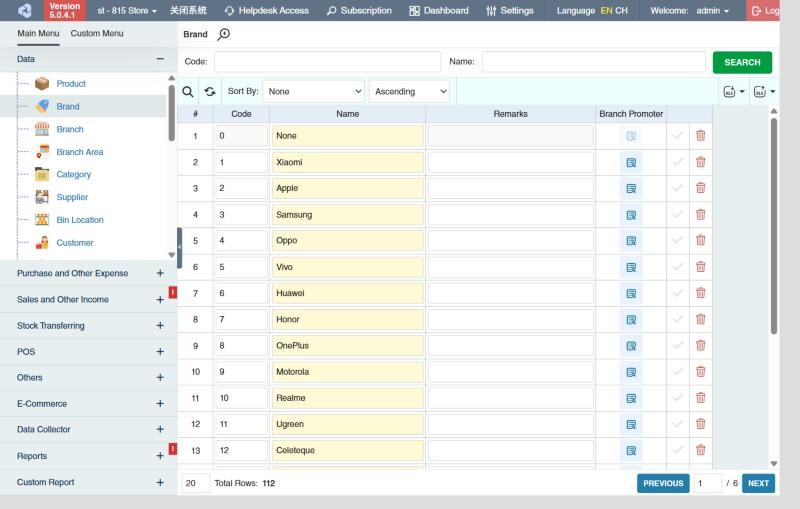
- To add: type in the empty row at the bottom of the list (at least the required yellow fields), then click ✔ at the end of the row.
- To change: edit the row, then click ✔.
- To delete: click 🗑 at the end of the row and confirm. You can't delete a record that's already used in transactions.
- To add many at once: use Import to upload an Excel file (download the template first).
Records with a detail window
Product, Branch, Supplier, Customer, Member, User and similar records have more fields. Click ⊕ in the toolbar to add one, or click a row to open it. Fill in the fields, then click Save.
For searching, filtering and exporting, see Working with lists.